Mobility and Recovery
How to Relieve Lower Back Tightness at Home: 5 Gentle Mobility Techniques
Lower back tightness can make everyday activities feel harder, from sitting at a desk to getting out of bed or bending down to pick something up. For many people, long periods of sitting, repetitive movements, physical activity, and muscle stiffness can contribute to discomfort.
The good news is that gentle movement, consistent mobility exercises, and better recovery habits may help you move more comfortably.
At Prana Body House, we believe that understanding your body is an important part of taking care of it. You do not always need an elaborate routine to get started. Sometimes, the first step is learning how to recognize tension and respond with intentional movement.
In this guide, you will learn five gentle techniques to help you manage everyday lower back tightness, improve movement awareness, and build a more consistent mobility routine at home.
Why Does Your Lower Back Feel Tight?
Lower back tightness can develop for several reasons. Common contributors include prolonged sitting, repetitive bending, changes in physical activity, and reduced movement throughout the day.
Your lower back also works in coordination with your hips, glutes, abdominal muscles, and upper legs. When movement is limited in one area, other areas may have to compensate.
However, tightness does not always mean a muscle is shortened or needs to be stretched. Discomfort can have several causes, so the right approach depends on your symptoms and overall health.
The goal is not to force your body into a deeper stretch. It is to introduce comfortable movement and pay attention to how your body responds.
Five Gentle Techniques, Step by Step
Each technique below includes the setup, the exact movement, a starting hold or repetition range, breathing cues, and a common mistake to avoid. Choose the ones that feel comfortable for your body; you do not need to do all five.
1. Gentle Pelvic Tilts
Setup: Lie on your back on a comfortable, supportive surface with your knees bent and your feet resting flat, about hip width apart.
- Let your arms rest by your sides and notice the natural small arch under your lower back.
- Gently engage your abdominal muscles and slowly tilt your pelvis so your lower back moves toward the floor.
- Hold for a few seconds without holding your breath.
- Relax and let your pelvis return to its starting position.
Starting hold or reps: Start with 5 comfortable repetitions, building toward 10 over time.
Breathing: Breathe out slowly as you tilt, breathe in as you release. The breath should stay calm and unforced.
Common mistake to avoid: Pressing the back hard into the floor or holding the breath. The movement is small and controlled, not a crunch.
Easier option: Place a small cushion under your head, or do the tilt standing with your back against a wall.
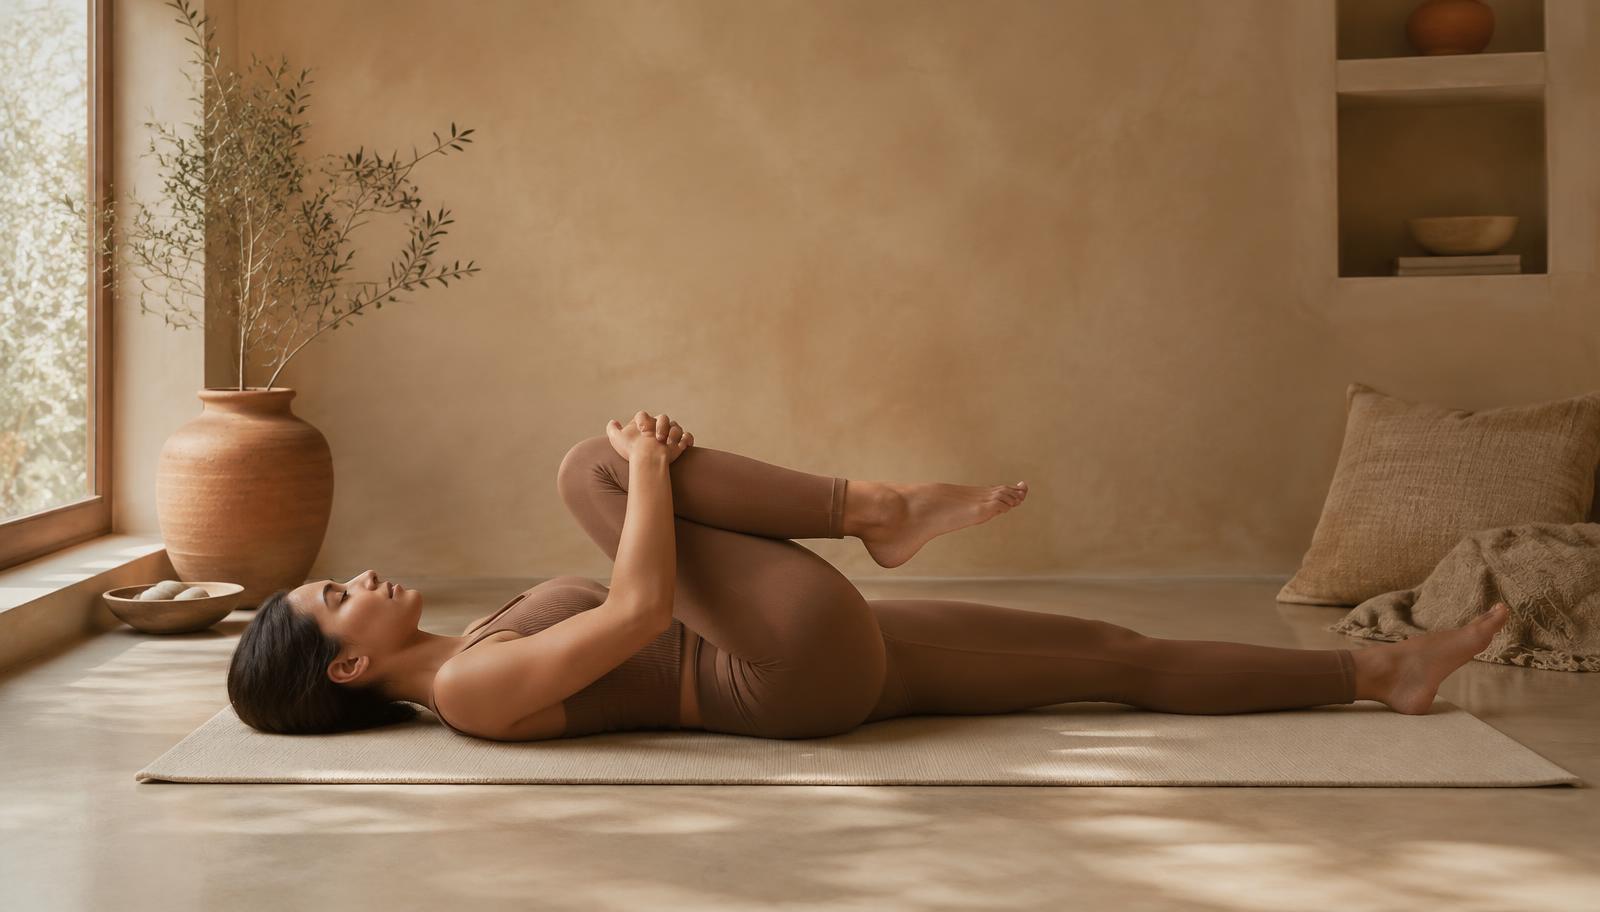
2. Knee to Chest (Only if Comfortable)
Setup: Lie on your back with your knees bent and feet flat.
- Slowly bring one knee toward your chest, using your hands behind the thigh to support the leg.
- Hold without forcing the movement, keeping the other foot on the floor.
- Return the foot to the starting position and repeat on the other side.
Starting hold or reps: 5 to 10 seconds per side, a few repetitions each.
Breathing: Breathe normally throughout; let each exhale soften the leg a little closer without pulling.
Common mistake to avoid: Pulling hard on the shin or lifting the head and shoulders. Support behind the thigh and keep the head down.
Easier option: Skip this one entirely if it causes discomfort, and use pelvic tilts and cat cow instead. You can also keep the knee farther from the chest.
3. Cat Cow
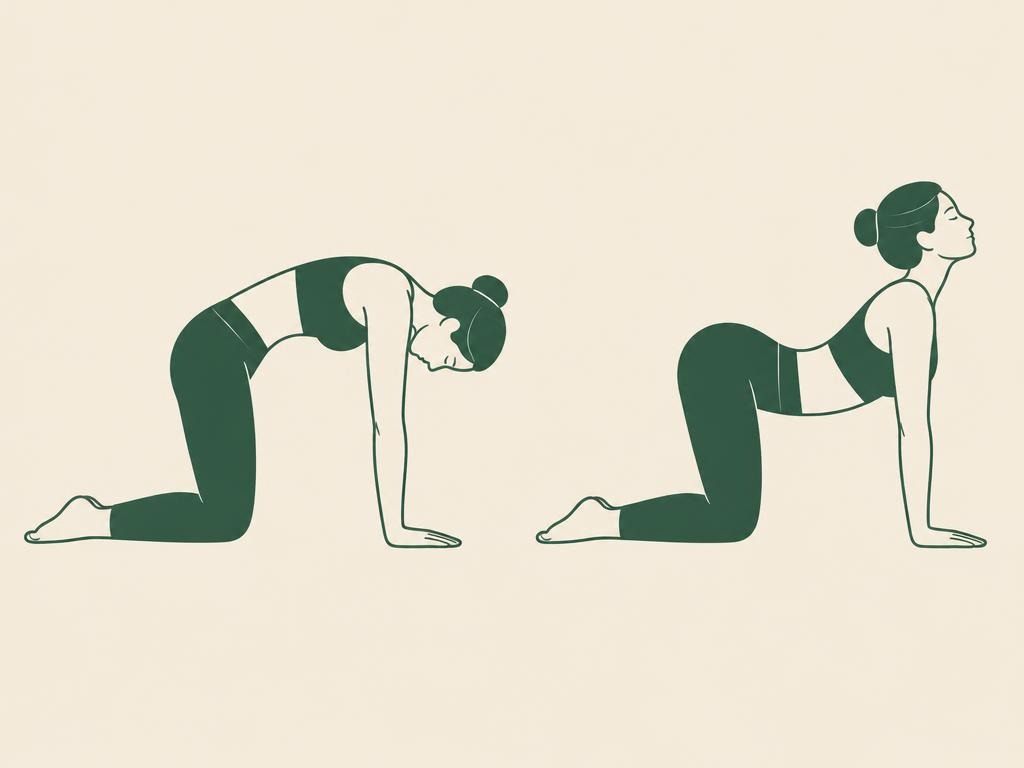
Setup: Come onto your hands and knees with your hands under your shoulders and your knees under your hips.
- As you breathe in, gently let your belly soften and lift your chest and tailbone.
- As you breathe out, round your back slowly and let your head relax.
- Move smoothly between the two positions without forcing either end.
Starting hold or reps: 6 to 10 slow rounds.
Breathing: Let the breath lead: inhale to open, exhale to round.
Common mistake to avoid: Rushing or pushing into the end ranges. Slow, small waves are more useful than big fast ones.
Easier option: Do the same movement seated in a chair with your hands on your knees.
4. Supported Child's Pose
Setup: Kneel on a comfortable surface with a cushion, folded blanket, or pillow in front of you.
- Bring your big toes to touch and widen your knees as much as is comfortable.
- Sit your hips back toward your heels only as far as feels easy.
- Rest your torso over the cushion and let your arms relax forward or by your sides.
- Stay still and breathe slowly.
Starting hold or reps: 20 to 30 seconds, 2 or 3 rounds, coming up slowly between rounds.
Breathing: Slow, full breaths into the back of the ribs; let each exhale settle your weight into the cushion.
Common mistake to avoid: Forcing the hips all the way to the heels. Support and comfort matter more than depth.
Easier option: Add more cushions under the torso, or do a seated forward rest with your arms and head on a table.
5. Standing Hip Mobility
Setup: Stand near a wall or stable surface for support, feet about hip width apart.
- Slowly shift your weight from one leg to the other a few times.
- If comfortable, make small circles with your hips, as if drawing a circle on the floor.
- Reverse the circle direction halfway through.
Starting hold or reps: About 30 seconds, keeping the movement small and controlled.
Breathing: Breathe normally and keep your shoulders and jaw relaxed.
Common mistake to avoid: Twisting the whole torso aggressively. Keep the ribs quiet and let the hips do the moving.
Easier option: Do gentle weight shifts only, or march slowly in place.
Alongside these techniques, one of the simplest ways to support everyday mobility is to interrupt long periods of sitting. Stand up every 30 to 60 minutes when practical, walk around for two to five minutes, and take a few slow breaths before returning to what you were doing. The exact interval matters less than finding a rhythm you can keep.
Take the next step with Prana Body House.
Take the Free Body AssessmentPair Mobility With Slow Breathing
Physical tension and stress can influence how you experience discomfort. Taking a few moments to slow your breathing may help you relax and approach movement with greater awareness.
- Sit or lie in a comfortable position.
- Relax your shoulders and jaw.
- Breathe in gently through your nose.
- Exhale slowly without forcing the breath.
- Continue for one to two minutes.
Combine this practice with comfortable movement rather than treating breathing as a substitute for evaluating persistent or unexplained symptoms.
How Often Should You Stretch Your Lower Back?
Consistency matters, but more stretching is not always better.
If gentle movement is appropriate for your symptoms, begin with a short routine and gradually adjust based on how you feel. You might start with five minutes of mobility work and a few movement breaks throughout the day.
Pay attention to your response during the exercises and afterward. If a movement increases your pain, stop rather than trying to stretch through it.
If your symptoms are new, severe, recurring, or related to an injury, consult an appropriate healthcare professional before beginning a stretching routine.
When Should You Seek Professional Help?
Not every case of lower back tightness is caused by muscle tension. Stretching may not be appropriate for every condition.
Seek urgent medical evaluation if back pain occurs with new loss of bladder or bowel control, numbness around the groin or saddle area, or significant or worsening leg weakness. Severe pain after a fall or accident also warrants prompt evaluation.
Arrange a medical assessment if your symptoms persist, worsen, interfere with daily activities, or travel down your leg with numbness, tingling, or weakness.
A qualified healthcare professional can help determine whether your symptoms are appropriate for mobility work or require another form of evaluation or treatment.
Can Assisted Stretch Therapy Help With Lower Back Tightness?
Assisted stretch therapy involves a trained practitioner guiding you through selected movements and stretches according to your comfort, mobility, and goals.
Depending on the individual, an assisted stretching session may help support flexibility, movement awareness, and relaxation. It is not a diagnosis or a guaranteed treatment for lower back pain.
An appropriate practitioner should review your concerns, ask about relevant health history, explain the movements, and modify or avoid techniques when necessary.
At Prana Body House, our approach to wellness emphasizes body awareness, intentional movement, and recovery education. We believe that understanding your needs is an important starting point for deciding which wellness resources may be appropriate for you. If you are curious about the practice itself, learn about stretch therapy and practitioner training.
Start With Understanding Your Body
Lower back tightness is a reason to pay attention to how you move, how often you change positions, and how you recover throughout the day.
Start with gentle movement. Avoid forcing a stretch. Build consistent habits, and seek professional guidance when symptoms call for it.
You do not have to guess your way through your wellness routine.
Take the next step with Prana Body House.
Take the Free Body AssessmentSafety note: never force a range of motion or stretch into sharp pain, numbness, tingling, weakness, or symptoms that worsen as you move. Stop if any of these occur, and seek advice from a qualified healthcare professional for concerning, persistent, or unexplained symptoms. Stretching does not diagnose, treat, or cure any condition.
Educational disclaimer: This article is for general informational purposes and is not a substitute for medical advice, diagnosis, or treatment. Individual needs and appropriate exercises vary.